|
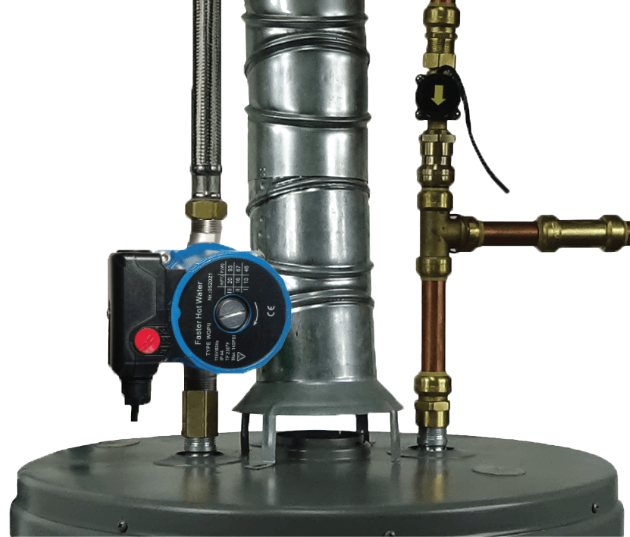
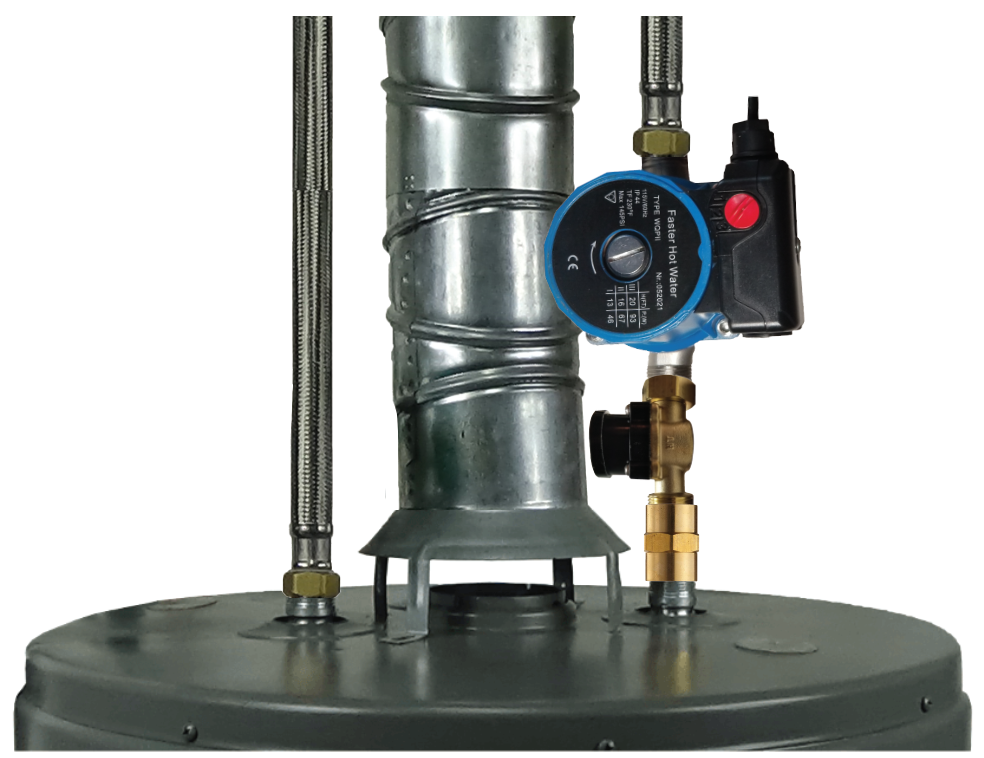
Step 11. Install the Flow Monitor:
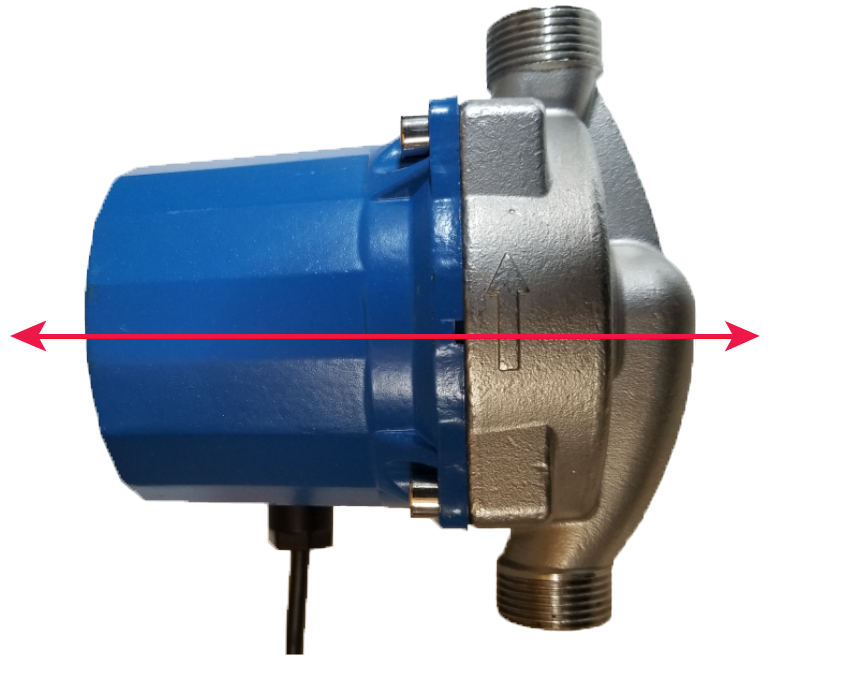
Wrap Teflon tape and/or apply pipe dope to the male threads of the Flow Monitor. Install the Flow Monitor directly into the 3/4"
fitting making sure the arrow is pointing down (the direction of water flow).
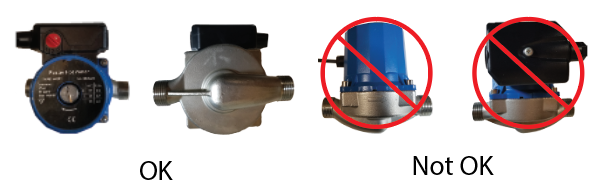
Note: The Flow Monitor will not work properly if the arrow is pointing up.
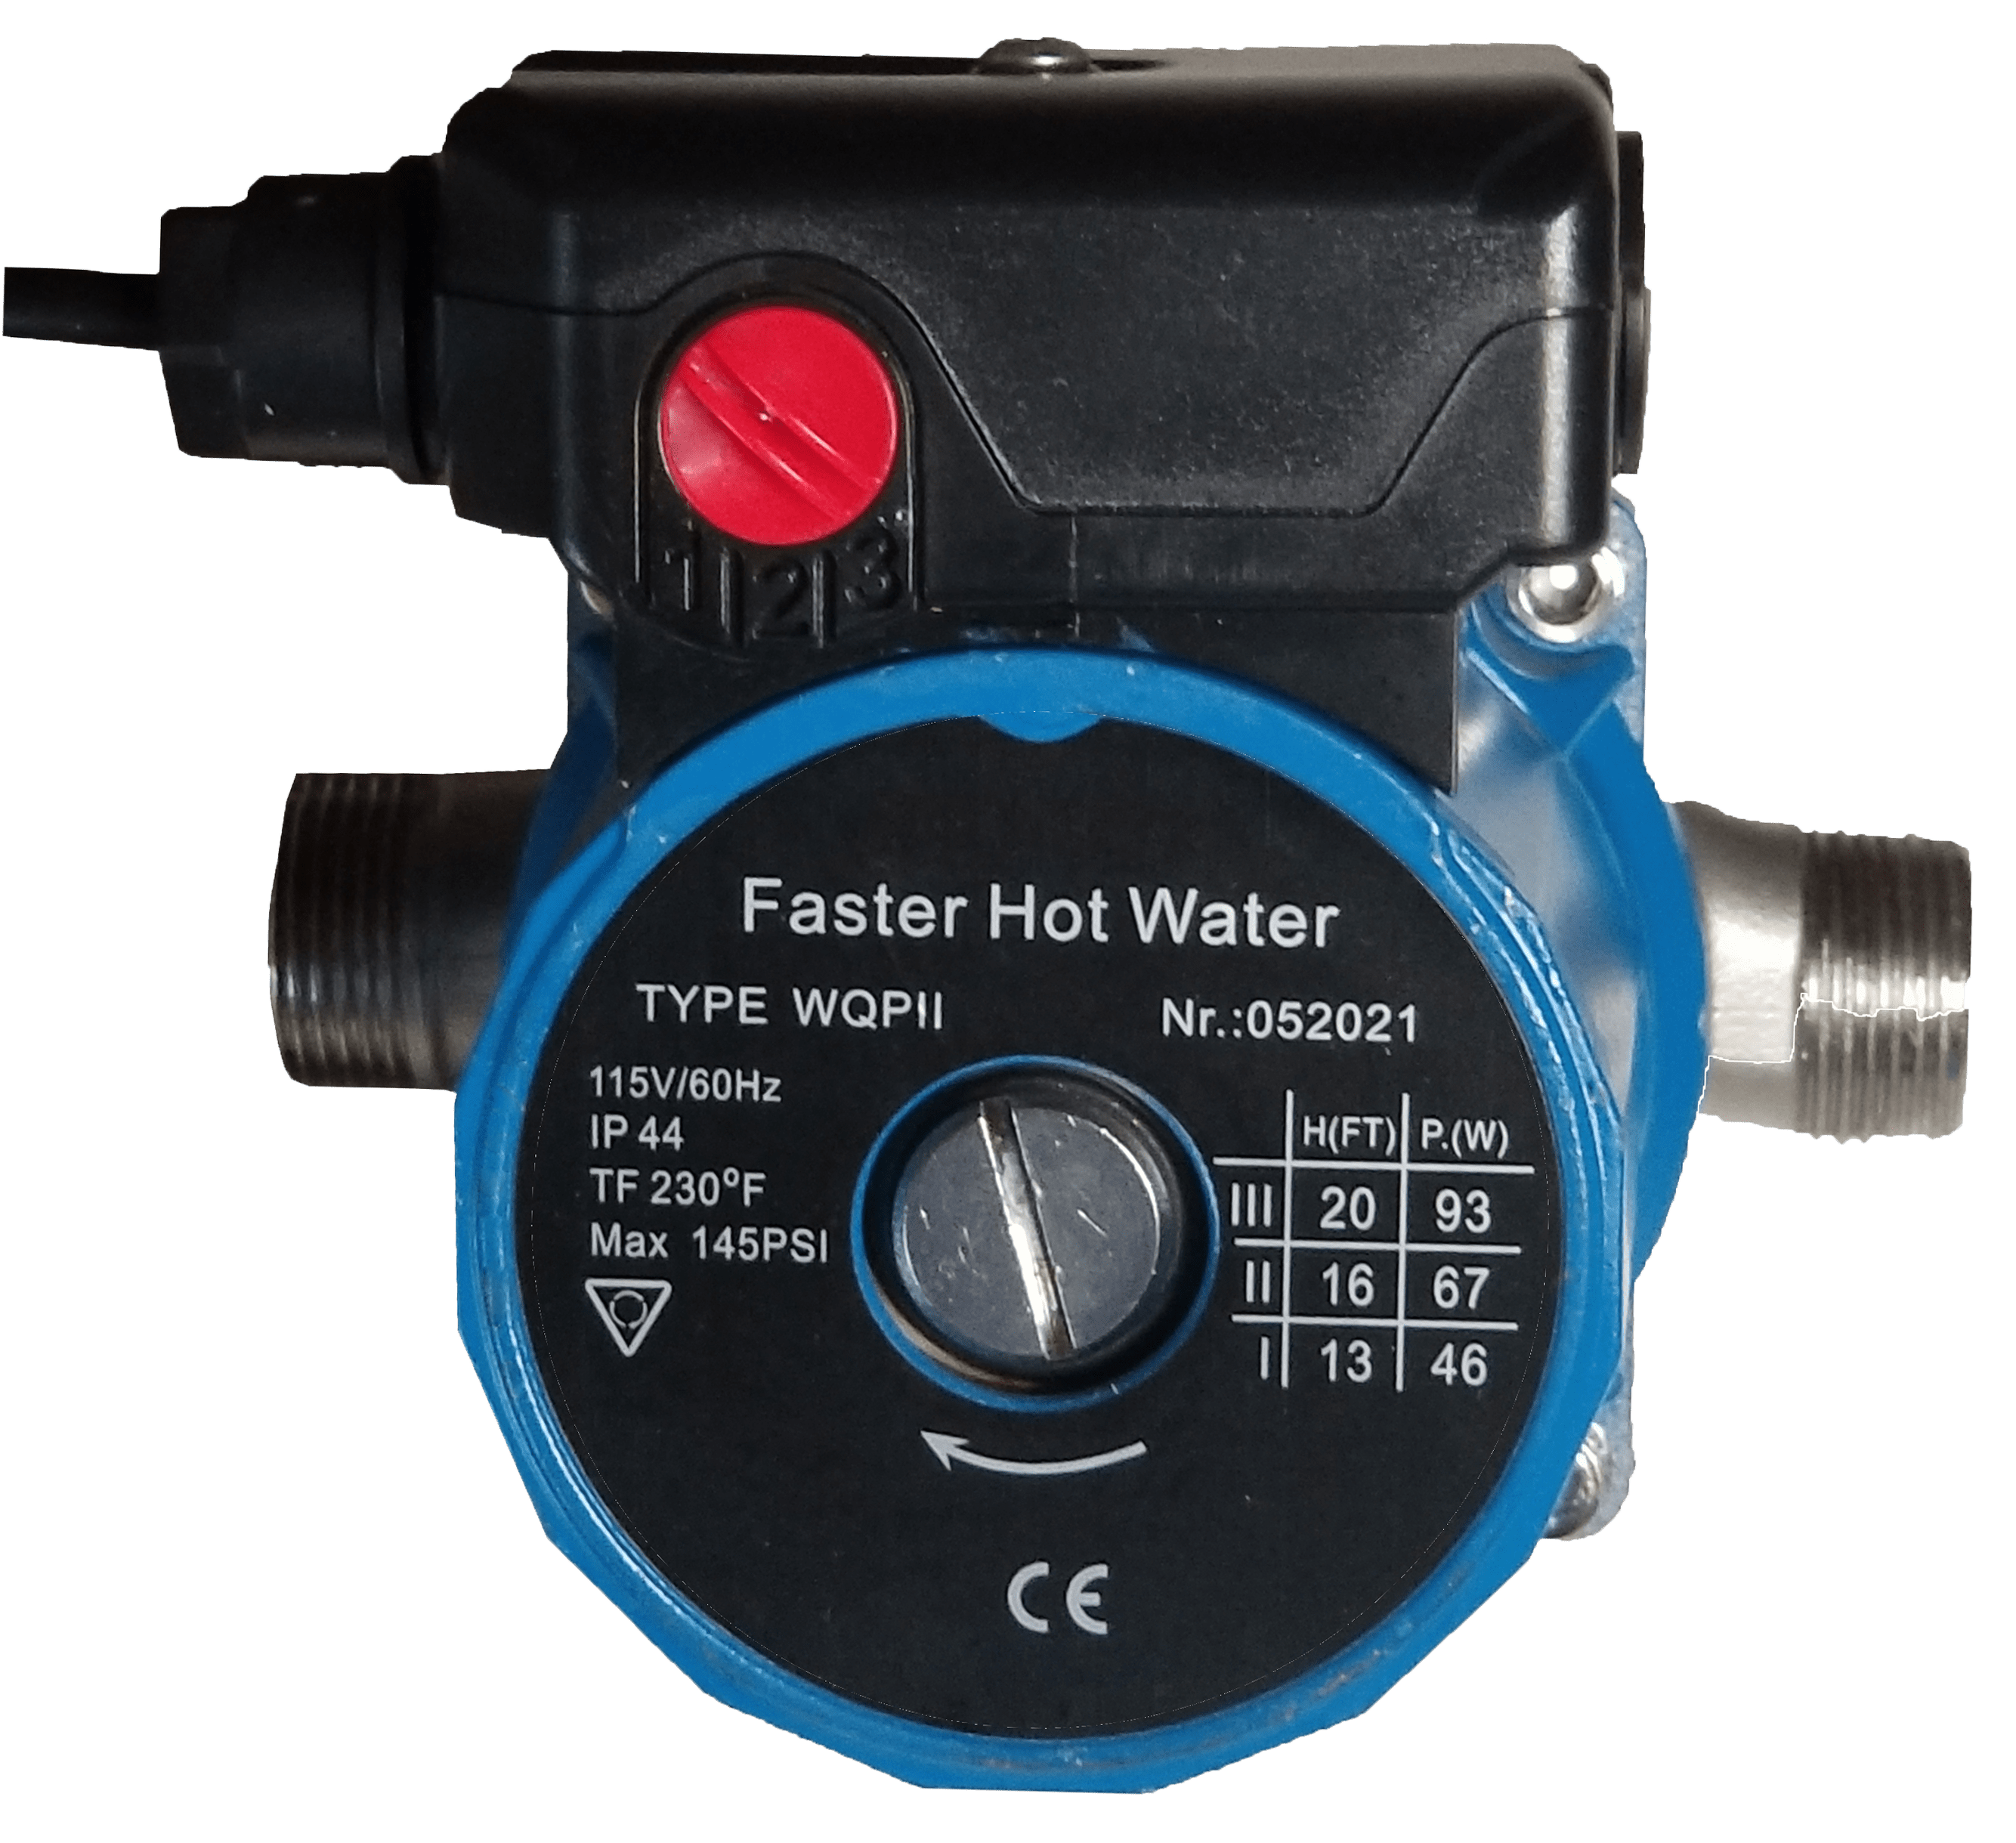
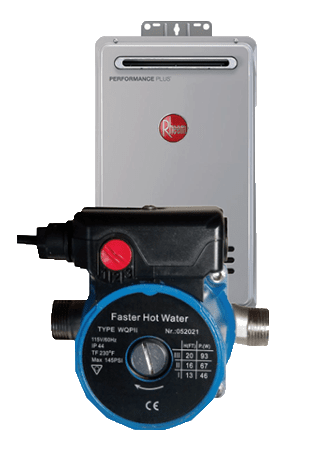
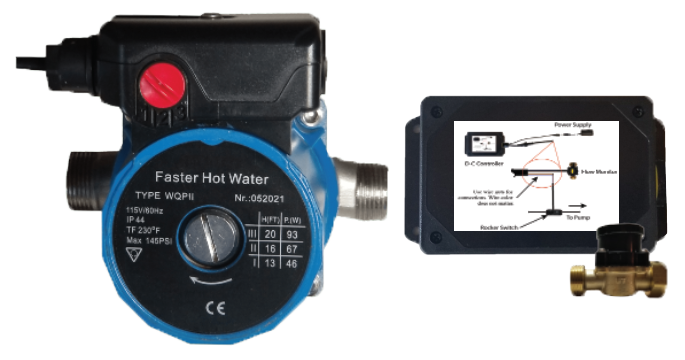
Step 12. Install the Pump:
Make sure the gasket is inserted in the female end of the Flow Monitor. Carefully thread the pump into the Flow Monitor with the arrow pointing down (the direction of water flow).
Note: Do not over tighten.
Step 13. Reconnect hot water supply line and turn on water:
Screw hot water supply line onto the pump. Make sure that a hot water faucet is turned on in the house and then slowly turn the water back on to the water heater. Check for leaks and repair as necessary. Leave the water running until all the air has been purged from the water pipes.
Turn off the faucet.
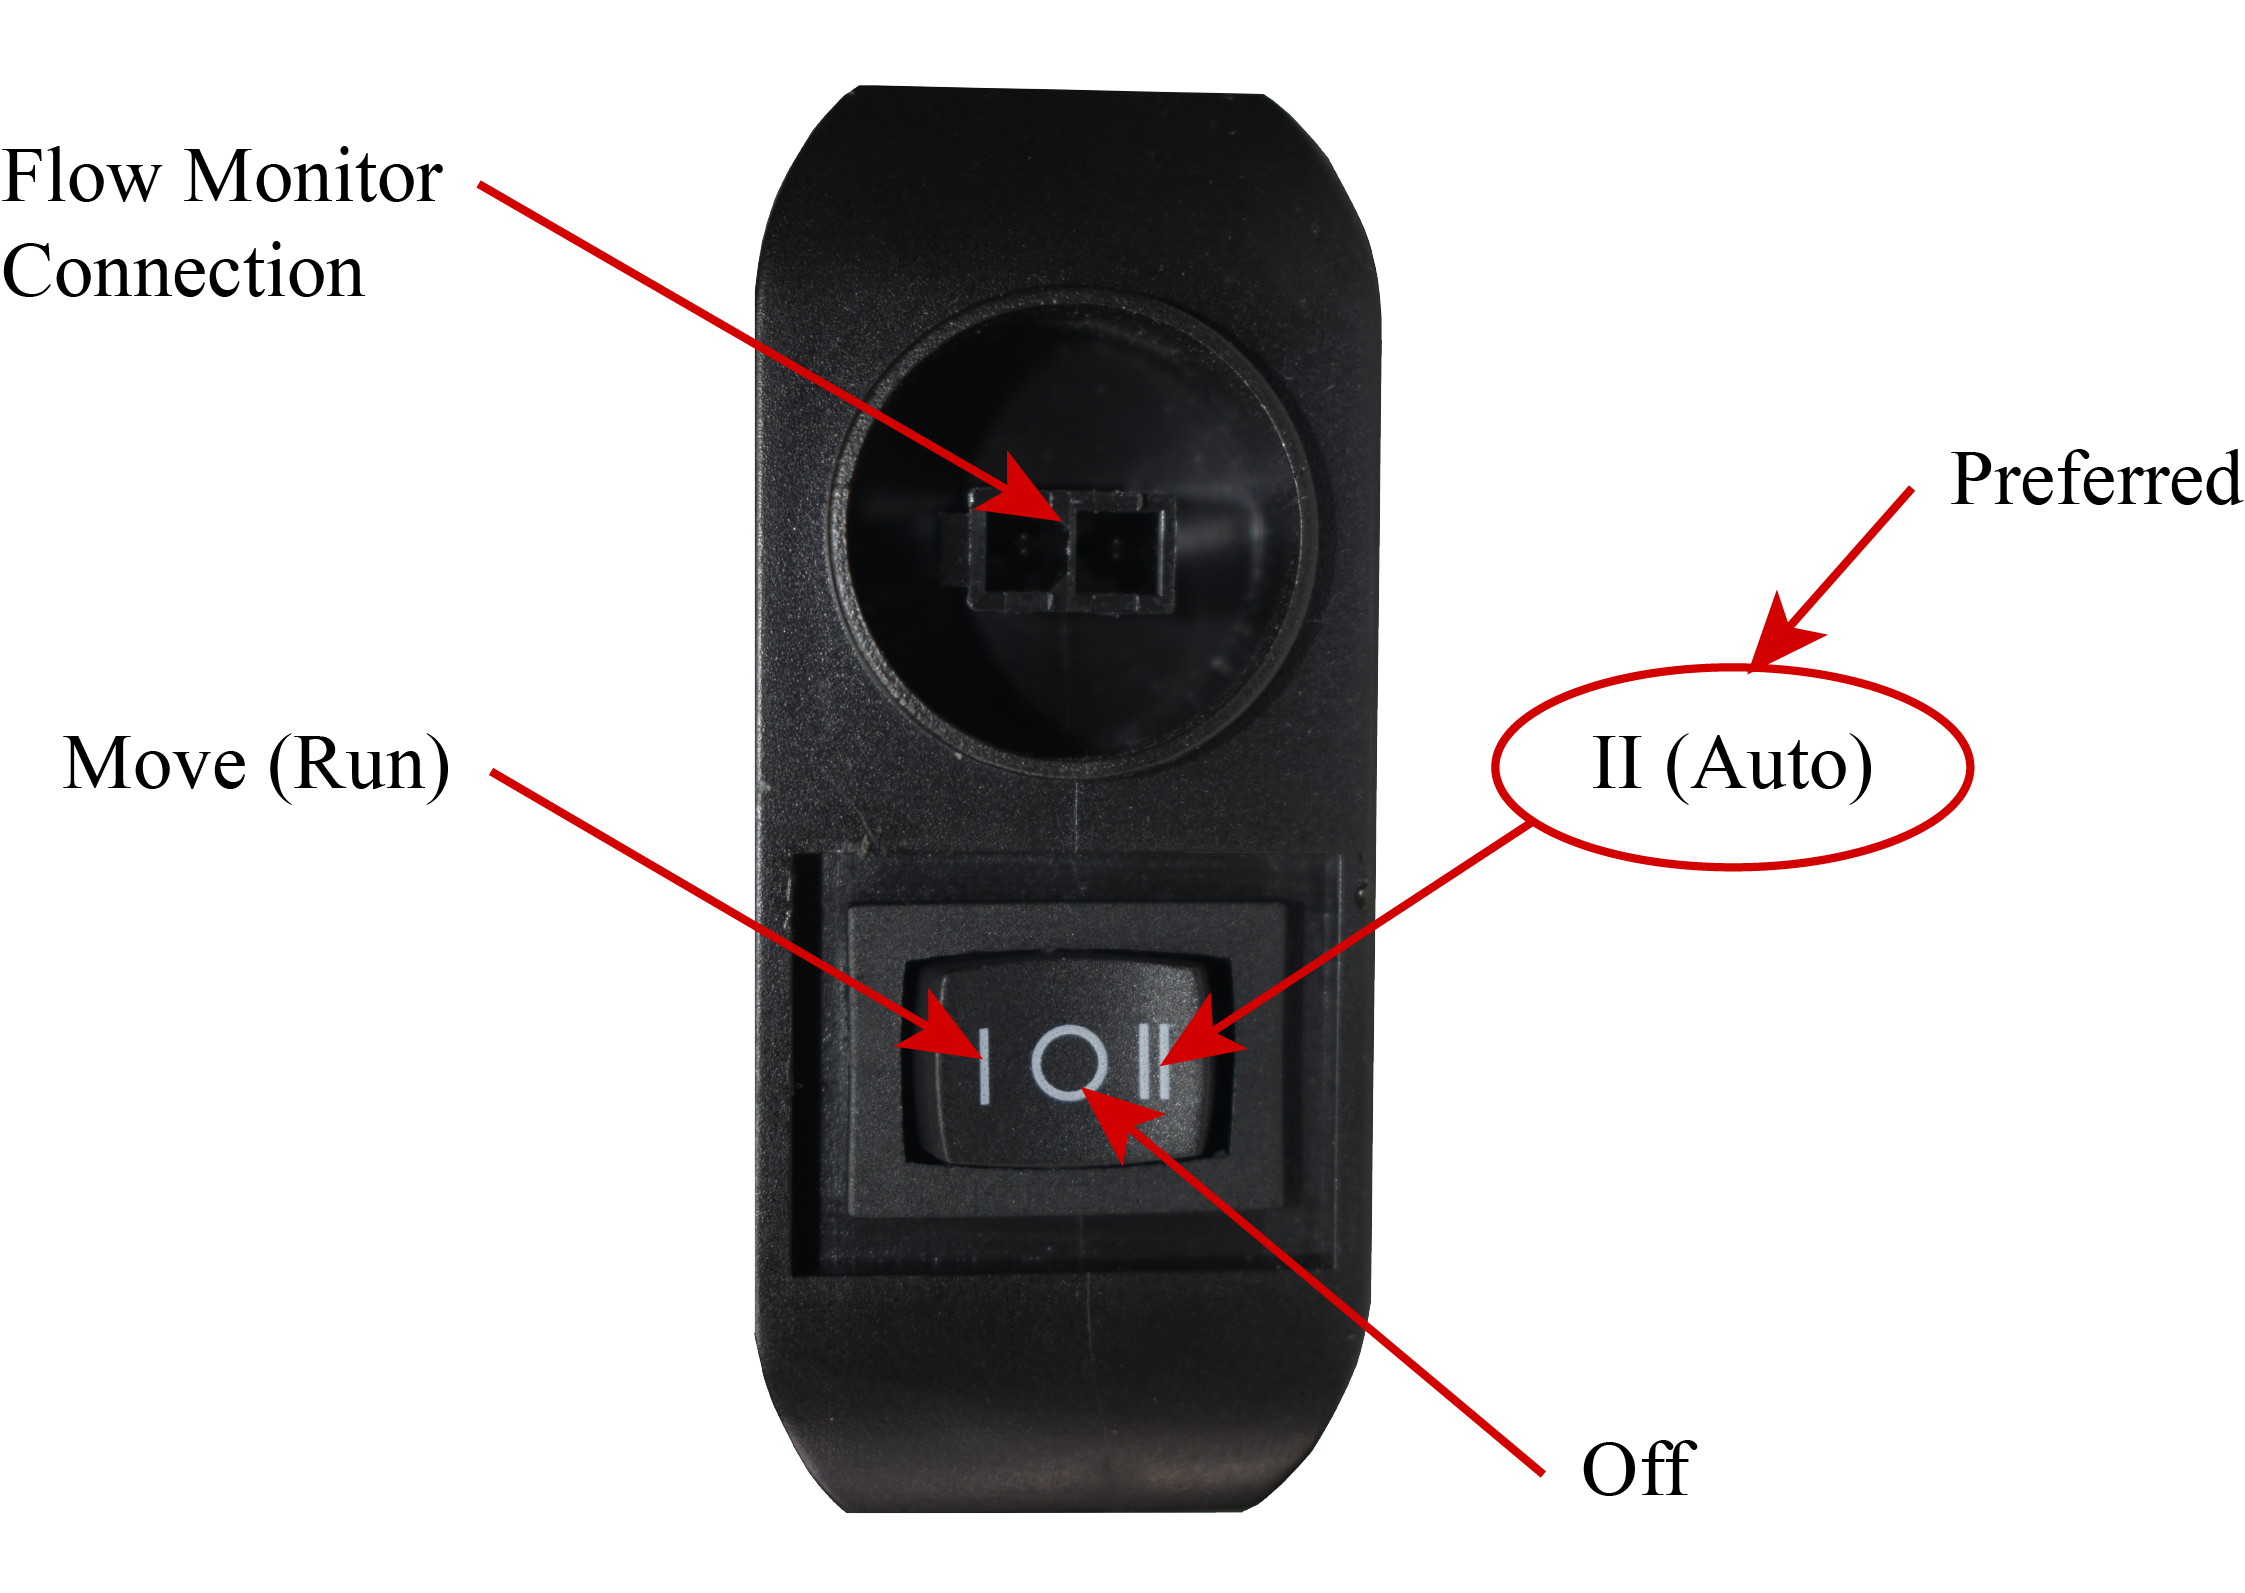
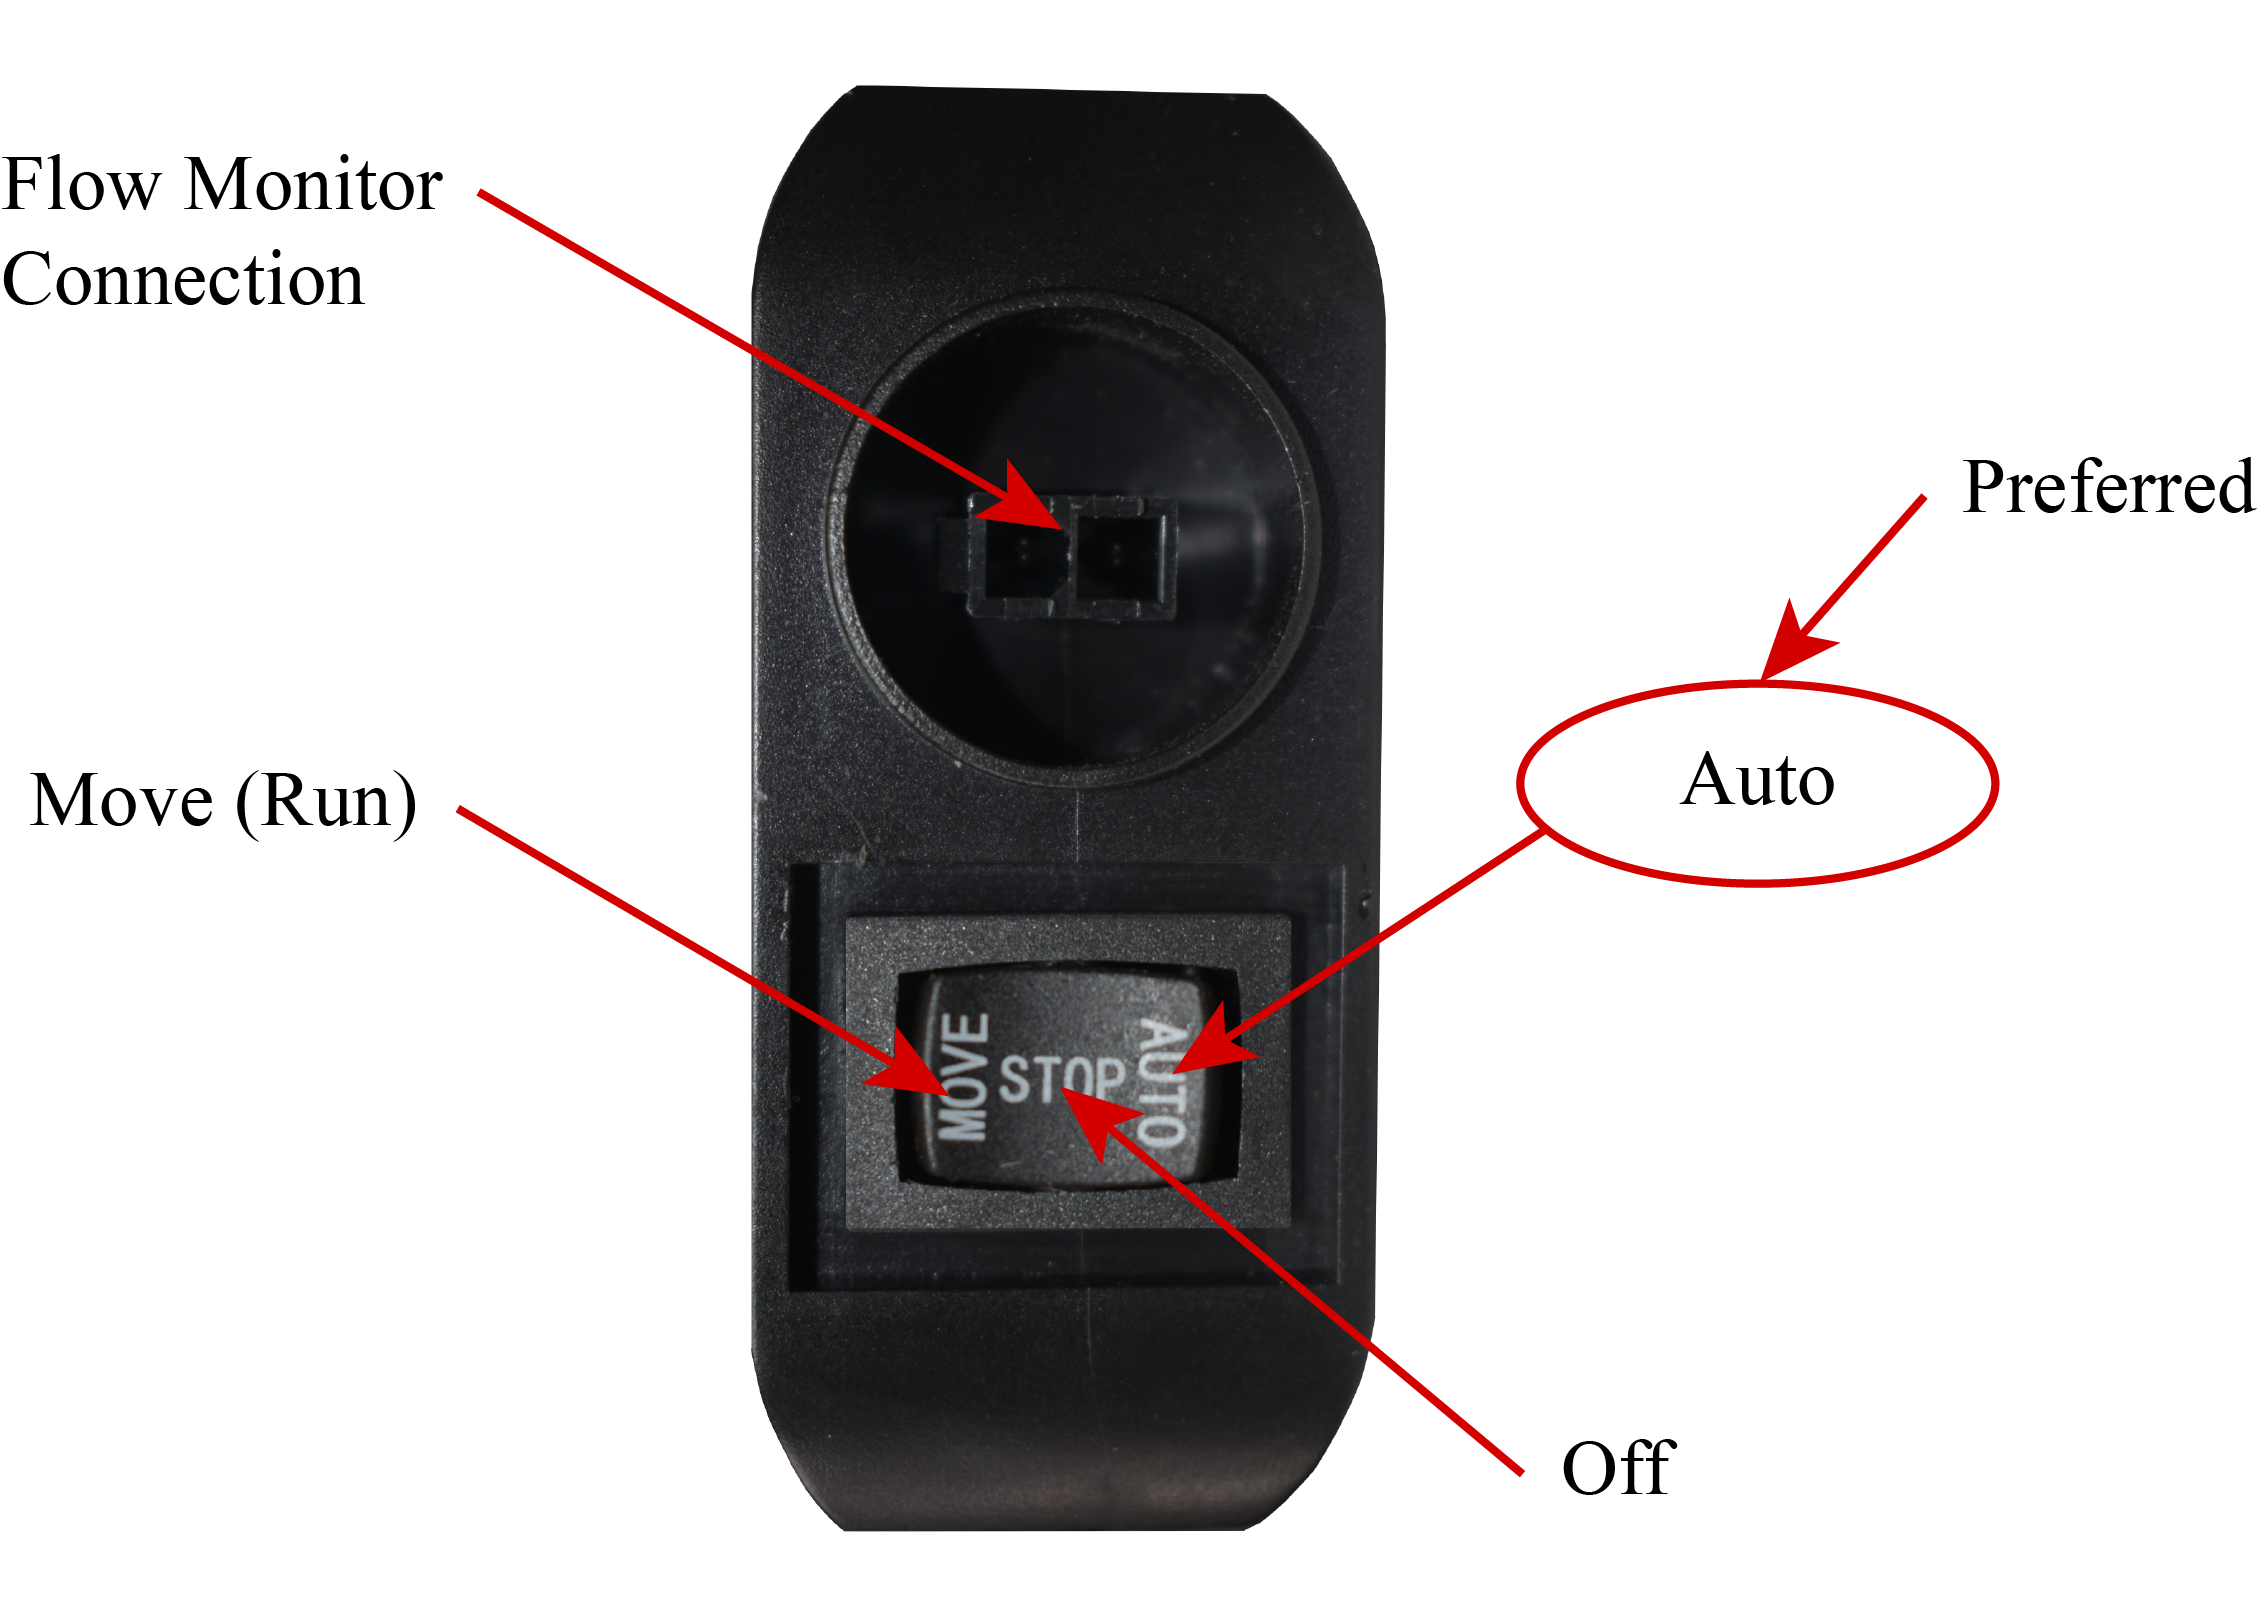
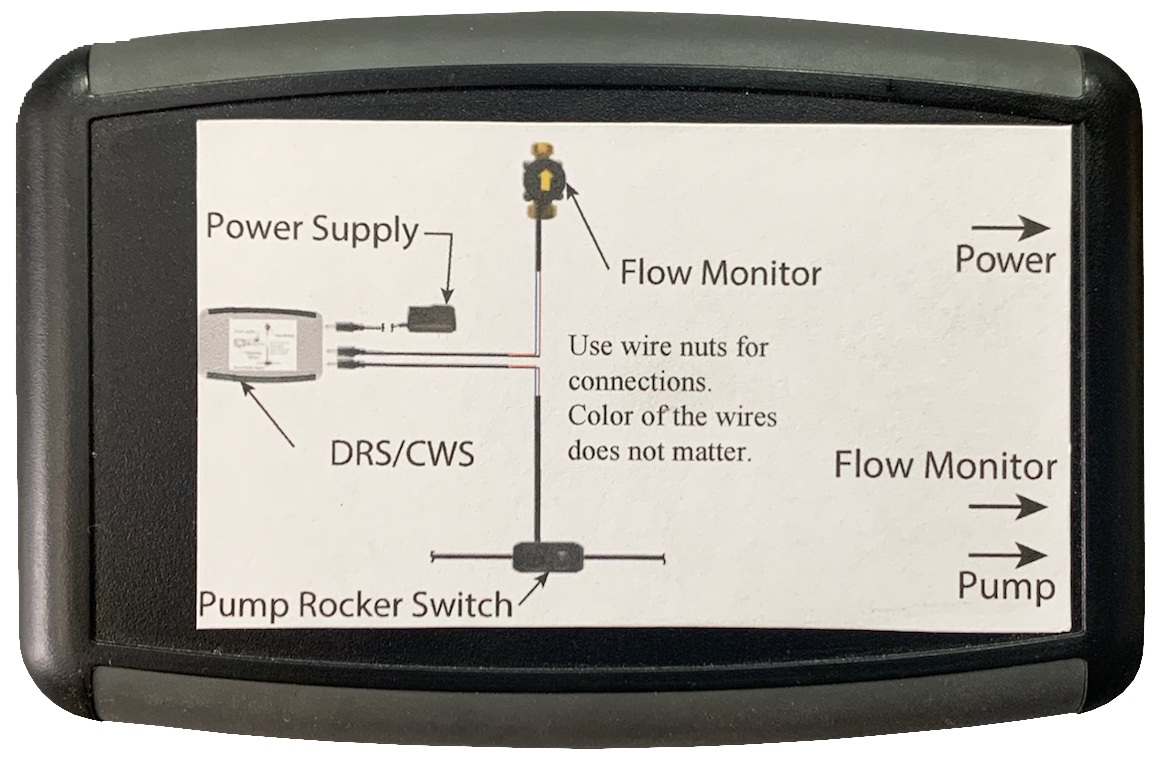
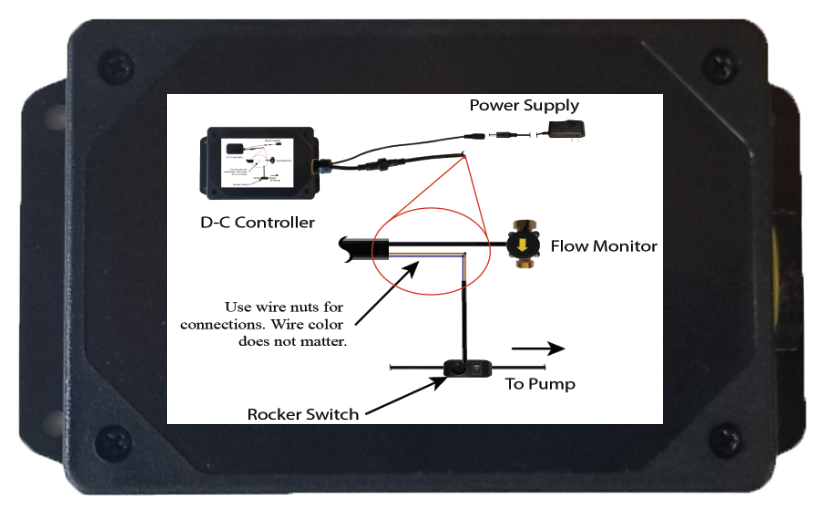
Step 12. Connect the pump and the Flow Monitor:
There are 2 switches that controls the speed of the pump and how it works. The first switch is located in the power cord and contains the connection box that the Flow Monitor wire snaps into.
Connect the wire from the Flow Monitor to the connector in the electrical wire from the pump. Set rocker switch to the Auto or II setting.

Set pump switch to 3 for the highest speed. Step 13. Plug the pump in:
Plug the pump into a properly grounded 110 vAC outlet.
Note: Route the cord away from any vents on gas, propane or oil fired water heaters.
Step 14. Test pump operation:
Turn on any hot water faucet in the house to start the pump. Turning off the faucet will stop the pump (assuming the Advanced Bridge Valve has not been installed yet).
Note: If the Advanced Bridge Valve has been installed the pump will continue to run until 95°F water reaches the sink where the Advanced Bridge Valve is installed. The temperature sensor in the Advanced Bridge Valve will shut off and the water will stop flowing (unless a hot water faucet is open).
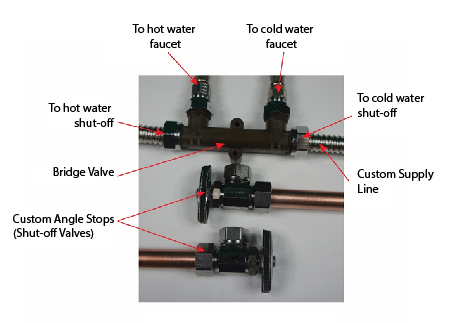
Bridge Valve™ Installation
Location:
The Advanced Bridge Valve should be installed under the kitchen or bathroom sink that is the farthest fixture from the water heater. Branched plumbing systems will need an Advanced Bridge Valve at the end of each line. Advanced Bridge Valves are available here:
Advanced Bridge Valve Purchase Page.
Installation:
- Turn off water to the house and drain the water from the pipes.
- Turn off both the hot and cold angle stops (valves) below the sink.
- Disconnect existing hot and cold water supply lines from the angle stops and replace angle stops with custom angle stops (see below).
- Attach new stainless steel advanced 1/2" x 1/2" supply lines to angle stops
- Attach other end of advanced supply lines to the appropriate "Cold Water In" and "Hot Water In" ports of the Advanced Bridge Valve. Tighten finger tight plus a quarter turn with a wrench.
 Do not overtighten.
- Attach existing faucet supply lines to the appropriate "Cold Water Out" and "Hot Water Out" ports of the Advanced Bridge Valve (if the existing supply lines are 3/8”, use the 1/2" x 3/8” adapters). Tighten finger tight plus a quarter turn with a wrench.
Do not overtighten.
- Attach other end of standard supply lines to the faucet. Tighten finger tight plus a quarter turn with a wrench.
Do not over tighten.
Do not overtighten.
- Leave angle stops in the off position and turn the house water back on and check for leaks.
- Open both the hot water and cold water angle stops and check for leaks.
- Turn on water: Make sure that a hot water faucet is turned on in the house and then slowly turn the water back on to the water heater. Check for leaks and repair as necessary. Leave the water running until all of the air has been purged from the water pipes. Turn off the faucet.
Bridge Valve™ Operation
The following steps will determine if the Advanced Bridge Valve is operating correctly.
- Close the cold water angle stop (valve) below the sink.
- Quickly turn the hot water faucet on and then off to activate the pump.
- Open the cold water faucet.
- Water should flow from the faucet until warm water (95°F) reaches the Advanced Bridge Valve. The flow should gradually decrease until no water is coming from the faucet at which time the Advanced Bridge Valve has closed.
Electrical Information
Safety Warning
Warning: Risk of electrical shock.
This pump is supplied with a grounding conductor. To reduce the risk of electrical shock, be certain that it is connected only to a properly grounded grounding type receptacle.
The safe operation of this pump requires that it be grounded in accordance with the national Electrical Code and local government regulations.
Operating Instructions
To activate the WaterQuick Standard hot water delivery system, simply turn on any hot water faucet in the house and quickly turn it off.
This will start the pump and within a few seconds you will have hot water everywhere in your home. The amount of time that you wait varies from home to home and is dependent on how far the sink is from the water heater, the size of your water pipes and how many turns there are in the water pipes.
|